
Part 1. What is OpenClaw?
OpenClaw (also known as Clawdbot, Moltbot, and Molty) is an innovative, open-source AI framework designed to provide users with a highly interactive and customizable chatting environment. In a digital landscape where data privacy and personalized workflows are paramount, OpenClaw bridges the gap between complex AI backend systems and everyday user accessibility. It empowers developers and tech enthusiasts to deploy their own AI agents locally or on a dedicated server, ensuring that you maintain absolute control over your prompts, memory data, and interactions.

Unlike standard, web-based AI chatbots that lock you into rigid interfaces, having OpenClaw installed on your machine offers unparalleled flexibility. It acts as a versatile dashboard—often referred to as the Control UI—that seamlessly connects with various Large Language Models (LLMs) like OpenAI, Anthropic, or Google. You aren't locked into a single provider; you can easily swap out models or integrate plugins (Skills) for web browsing, executing code, or managing calendars.
To run OpenClaw natively, the official documentation recommends having Node.js installed (Node 24 is highly recommended, though 22.14+ is supported) and an API key from your preferred model provider. However, depending on your operating system and technical comfort level, you might not even need to worry about these prerequisites. Whether you are running it on a Windows rig, a macOS setup, or a Linux server, OpenClaw ensures your AI assistant is always ready to perform.
Part 2. Install OpenClaw in Windows using AWZ ClawInsta [One-Click Installation]
Let’s be completely honest: dealing with Node.js environments, command-line interfaces, and complex path variables can quickly become a headache, especially on Windows. This is exactly why choosing AWZ ClawInsta is the ideal solution for Windows users.
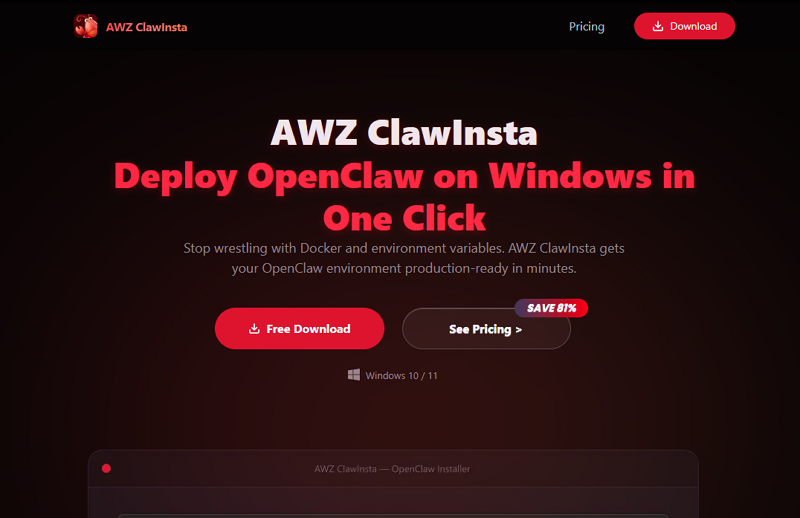
AWZ ClawInsta is a dedicated, user-friendly deployment tool designed specifically to turn the often-complicated OpenClaw setup process into a seamless, one-click installation. Instead of spending your weekend troubleshooting cryptic PowerShell errors or installing WSL2 (Windows Subsystem for Linux), AWZ ClawInsta automates the entire backend process. You literally just click "Quick Start" and let the software do the heavy lifting. Once it is set up, you simply enter your API key and launch the chatting dashboard. It is incredibly safe, remarkably fast, and completely eliminates the technical learning curve.
Step-by-Step Guide to Installing OpenClaw Using AWZ ClawInsta
1. Download and Install ClawInsta
Click the "Try ClawInsta Free" button below to download the installer. Double-click the downloaded file to run it, and hit the "Install Now" button. Once the installation is complete, click "Start Now".
2. Quick Start OpenClaw Deployment
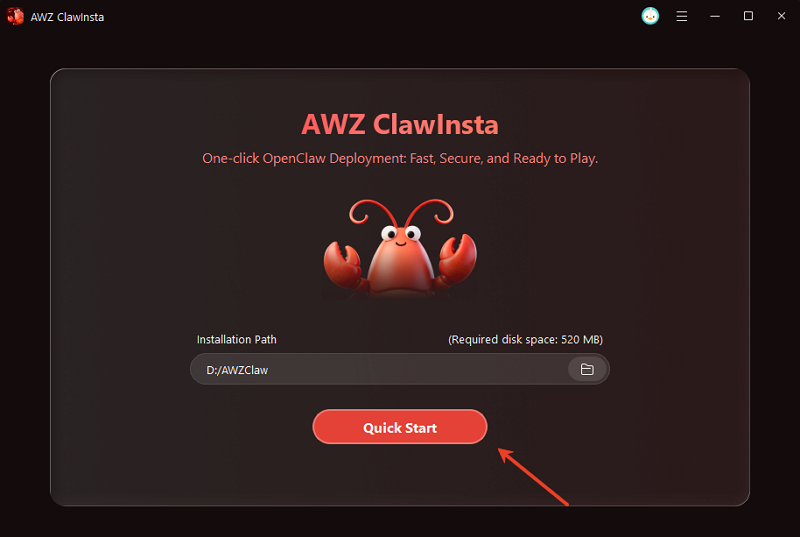
After launching AWZ ClawInsta, simply click the Quick Start button. The program will automatically download the OpenClaw core files, isolate the required Node environments, and configure the local server ports in the background. Grab a cup of coffee; this only takes a minute or two.
3. Set Up Your API Key and Start Chatting
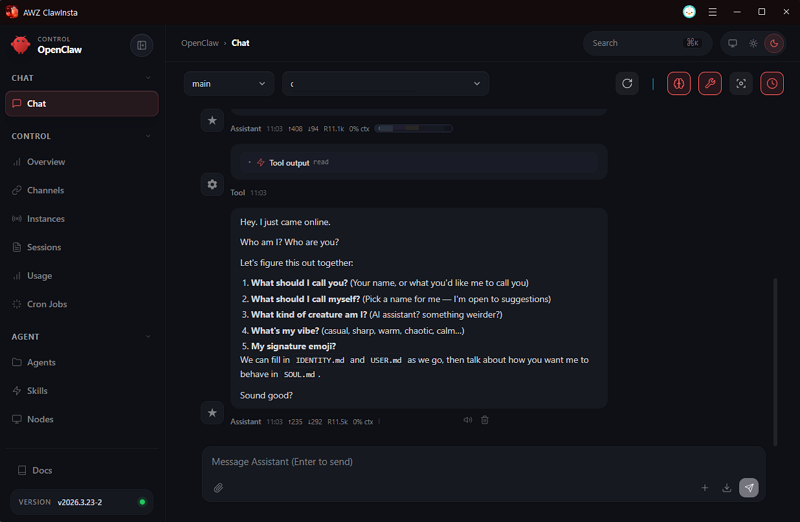
Once the automatic deployment finishes, AWZ ClawInsta will prompt you to enter your API key. Paste your key into the designated field and hit Confirm. ClawInsta will immediately launch the OpenClaw dashboard, and you will be ready to chat with your AI agent!
Part 3. Install OpenClaw in Windows using PowerShell
While OpenClaw does offer native Windows support now, the community consensus is clear: if you want to avoid weird compatibility bugs with community plugins or Python scripts down the line, you should use WSL2 (Windows Subsystem for Linux 2). It gives you the stability of Linux right inside your Windows environment. Now, let’s move on to the step-by-step guide on how to install OpenClaw on your Windows.
Step 1. Check Your Prerequisites
OpenClaw relies heavily on Node.js. As of 2026, the official recommendation is Node 24 (with a minimum requirement of Node 22.14+). The installer script usually handles missing dependencies, but ensuring your network connection to package managers is stable will save you headaches.
Step 2. Run the One-Click Installer
Open your PowerShell (Run as Administrator is highly recommended to avoid permission hiccups), and paste the following command and hit Enter:
iwr -useb https://openclaw.ai/install.ps1 | iex
Step 3. Acknowledge the Security Warning
Wait a moment for the initial payload to download. OpenClaw will pause the installation to display a security advisory. Because this tool has deep access to your system, use your arrow keys to select "Yes".
Step 4. Select Your Installation Type
Select "QuickStart" under the Onboarding mode. This applies safe, tested default configurations so you can get the bot running immediately without getting bogged down in advanced settings.
Step 5. Choose Your LLM Provider
Next, select your preferred Large Language Model (LLM). If you're looking for the best performance in logic and coding, Anthropic’s Claude is the top choice among users right now. However, if you want to save money, MiniMax is a great budget-friendly option.
Step 6. Generate and Input Your API Key
Go to your AI provider's developer console to create a new API key and add credits to your account. Go back to OpenClaw terminal, paste the key.
Step 7. Choose Default Model
Select a model from your selected LLM provider.
Friendly reminder: The most powerful models are also the most expensive. If you’re on a budget, you might want to avoid the top-tier options to keep your costs down.
Step 8. Select Your Integration Channel
This determines how you'll interact with your new AI assistant. If you aren't sure yet, just select 'Skip for now'.
Step 9. Configure Additional Skills
The OpenClaw installer will ask if you want to install extra skills (like web scraping, advanced vision, etc.). To keep this initial setup quick and clean, select "No". Rest assured, you can easily add any of these skills later via the Web UI or command line.
Step 10. Enable Bash Shell Completion
Optionally, the setup will ask to enable bash shell completion. If you plan on using the command line frequently, turn this on. OpenClaw will automatically suggest completions for your commands as you type, making the tool much faster and more intuitive to use.
Step 11. Finalize the Setup
Once dashboard is ready, just copy and paste the dashboard link in your browser to control OpenClaw and start chatting with you AI agent. To verify your deployment, simply send a greeting. A response confirms that your private AI agent is active and online.
Part 4. Install OpenClaw on macOS / Linux using Script
If you're using a Mac or running a Linux distro, you are in the sweet spot. macOS (especially with the M4-series chips) and Linux are essentially the native playgrounds for this tool. Deploying OpenClaw here is an incredibly smooth experience.
Step 1. Execute the Terminal Script
Pop open your Terminal and paste the official quick-install command:
curl -fsSL https://openclaw.ai/install.sh | bash
This bash script is smart enough to detect your system architecture and will automatically pull the correct Node.js environment if you don't already have it installed.
Step 2. Accept the Security Warning
Right after the core downloads, the terminal will flash a stark security warning. This is OpenClaw politely reminding you that it will have deep system access. Read it, understand the risks, use your arrow keys to select "Yes," and hit Enter to proceed.
Step 3. Choose Installation Type
Select “Quick Start”. This applies safe, tested default settings to your bot. You can always dive into the configuration files to make custom tweaks later once you understand how the agent operates.
Step 4. Select Your Model Provider
In the next step, it’ll ask you which Large Language Model (LLM) you want to use.
Step 5. Input Your API Key and Choose Your Specific Model
Head over to the developer console of your chosen provider, generate a new API key, and fund your account. Copy that key and paste it directly into your terminal when prompted.
Next, you'll choose the exact model version. Be mindful here: choosing the most advanced model (like Claude Opus 4.5) as your default will drain your API credits quickly. For everyday tasks, a mid-tier model like Sonnet 4.5 offers the best balance of speed, intelligence, and cost-efficiency.
Step 6. Choose Your Communication Channel
This step is to select your channel so you can talk to your bot. Definitely, Telegram is the best and most welcome choice.
How to Link Telegram to OpenClaw:
- Open Telegram, tap the search bar, and type @botfather to open a chat.
- Send the command “/newbot”, then follow the on-screen prompts to give your bot a name and a unique username.
- Once your bot created successfully, copy the token and switch back to OpenClaw terminal and paste it in.
Step 7. Configure Skills and Add-ons
In the next step, OpenClaw installer will ask if you want to install additional skills. For a baseline setup, it's perfectly fine to select "No" for now.
Step 8. Enable Bash Shell Completion
OpenClaw will ask you if you want to install bash shell completion. We highly recommend selecting "Yes". This feature will auto-suggests command completions as you type, significantly speeding up your workflow when interacting with the CLI later.
Step 9. Finalize the Node Manager
Choose npm as your preferred node manager for future skill installs, and continue selecting "No" or the default options for the remaining advanced prompts until the setup finishes.
Step 10. Test Your Deployment
Once the bot successfully "hatches," the OpenClaw terminal will output a local URL for your Web Dashboard. Open it in your browser to confirm everything is running. Finally, go back to Telegram, search for the bot you created, and say "Hello." If it replies, congratulations—your private AI agent is officially online!
Part 5. Summary
Whether you are running Windows, macOS, or Linux, installing OpenClaw opens the door to a secure, localized, and incredibly smart AI chat experience. While developers have robust official options like bash scripts, WSL2, Docker, and npm, we cannot stress enough how much time AWZ ClawInsta saves for Windows users. It takes the guesswork out of the equation, offering a safe, fast, one-click setup that gets your AI agent up and running in minutes without touching a single line of code. Don't let technical hurdles slow you down—download AWZ ClawInsta today!
Part 6. FAQs about OpenClaw
1. Is OpenClaw free to use?
Yes! The OpenClaw framework itself is completely open-source and free to install. However, depending on the AI model you choose to connect it to (like OpenAI or Anthropic), you will need to pay for your own API usage.
2. Do I need coding experience to deploy OpenClaw?
Not at all. While developers can use command-line methods (like npm or curl) to deploy OpenClaw, beginners can easily use tools like AWZ ClawInsta on Windows for a seamless, zero-code, one-click installation process.
3. What is the Gateway and why do I need it?
The Gateway is a core background process (usually running on port 18789) that securely handles the communication between your local OpenClaw dashboard and the external LLM providers. It ensures your API keys stay safe and manages the execution of local plugins and tools.

